Saturday, 11 January 2014

Windows XP Support Ending in 2014!

by Unknown  |  in windows at  1/11/2014

After 11 Years Long Journey, The Microsoft has decided to close the Windows XP Support on 8th April, 2014!
What is Windows XP Support ? In Windows XP, Microsoft has provided support to run Windows XP, Which determine the user how to run your PC in a specific manner. It also appears as a XPWiki, contains of a number of answers of problems related to the Windows XP.

Probably, It had been a great resource for the users of Windows XP, but sadly The Windows XP Support now bends towards on a ending position.

What to do Next ?

Now, What to do ? in future, after the end of XP Support, You are gonna considerably an UN-safe Windows user.

How can I stay safe ?
To stay on protection constant track, you'll have two options:

1. Upgrade the PC 

Now, It's 2014 and The technology moving fastly, Upgrade your PC by installing Windows 7 or 8, You can easily get the Windows 7 or 8 by downloading on MicrsoFT.COM or you can also purchase a DVD of Windows. If your system can't handle or render the windows or it can't match with the requirments of the windows, so buy a new PC existing of better  configuration.

2. Run the Windows by installing a Anti-Virus

Yeah! Anti-Virus software also used to protect or be safe from the predators of the hacking world, Install a Anti-Virus you'll get popular one's by googling it.

CPU-Z on Android: Get full information of your Android

by Unknown  |  in reviews at  1/11/2014
Want to get full information about your android device? There is a free app i.e CPU-Z which does the task well. After getting popularity on PC/Windows now this free app is on android which gives a lot information about your android.

This app include information about:
• SoC ( System On Chip ), CPU architecture, name, speed and etc.
• System Information: Hardware, Display, Manufacture, Software and much more related to System.
• Battery Information, Health, Temperature and etc.
• Sensors: Gravity, Proximity, Light sensor, Temp and all others.

This app requires android version 2.2 and above versions.
The best thing is that this is a freeware app you can redistribute it :)

Some Screenshots (from my mobile):


SOC displaying the tree structure view or interface of the app, 
The interface showing the capable options of the Android Device, which are as follows
  • CPU ARCHITECTURE (used to identify the CPU name)
  • Cores (Processor quantity)
  • Revision
  • Clock Speed (The speed of the displaying clock on the right-top of the screenshot)
  • Core 0 (Core 0 displaying the speed of processor)
  • CPU Load  (Load taken currently by the CPU)
  • GPU Vendor ( Graphics processing unit designer)
  • GPU Renderer (GPU installer)
System, displaying the information, which as follows:
The main options selected from the system tab are only three:
  • Model (which type of android mobile do you have ?)
  • Manufacture (Company)
  • Board (MotherBoard)

Screenshots Gallery: (Maximize the Screenshot to watch clearly)

Tuesday, 7 January 2014

Set up a Schedule Task in Windows XP, Vista and 7

by Peter  |  in windows at  1/07/2014
Hey, We are now bring a unique tutorial in Windows, The tutorial is about How to set up a Reminder Calendar or Schedule Task in Windows.

Schedule Task is basically a pre-installed program in the windows, which enables the users to remember their work's, and keep the user stay in touch with their projects. The schedule task is basically built to remind the user's daily database.

We are going to start the tutorial!

Before performing Task?
Now, first open your Windows (XP, 7,Vista)

For Windows XP & Vista :

Step 1:

  • Go to the Start-up menu and then go to ALL Programs or Programs

Step 2:

  • Now, Point your mouse on the Accessories button, and the button would hover a gradient blue color. 

Step 3: 

  • Inside the Accessories, then find Schedule Task and Open It!

Now, the window of the schedule task will open, including with some auto-tasks. On the given task, their is a option ADD A SCHEDULE TASK and double click on it.
and fill up the settings of ADD SCHEDULE TASK and then Finish!
Note: Label the project name and remember to add the timings, on which do you want to appear the schedule task or reminder task.

For Windows 7:

Step 1:

  • Go to Start up menu. 

Step 2:

  • Inside the start up menu, go to CONTROL PANEL

Step 3:

  • In control panel, drag the mouse to System and Security 

Step 4:

  • and Finally, click on the schedule task place inside the Administrative tools.
The schedule task or reminder task window will appear!


Sunday, 5 January 2014

Use USB as RAM

by Unknown  |  in windows at  1/05/2014

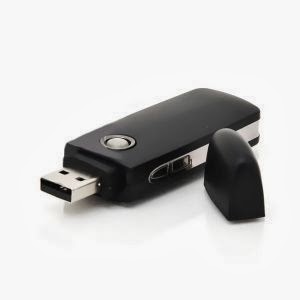
There is a lot of times that your PC get too slow due to limited RAM. There are a lot of tricks that conducts the fake procedure to increase your limited memory and due to fake steps your PC becomes downwards. In this tutorial you will learn how to use a USB Drive as your computer RAM and increase your computer's speed. For this purpose your USB drive should have at least 2 GB. Following are the steps to increase RAM:


Step 1: Right Click on Computer and select Properties.


Step 2: First click on Advance Tab. Now in the Advance Tab click Click on Settings under Performance.


Step 3: Click on Advance Tab.


Step 4: Click on Change Button under Virtual Memory.


Step 5: Select your USB device and Click on Customize Size and set the values as follows.


Step 6: Click on Set button and Select OK. Now you have to restart your computer with USB drive inserted.

Now the speed of your computer will be increased.
Feel free to comment on this post if you have any problems.

Thursday, 2 January 2014

Web Page Bookmark in Google Chrome ?

by Peter  |  in Tutorials at  1/02/2014
The old interface of Google! :P Just place this to thumbnail the post

Google Chrome is a perfect browser for the instant reach to the web page. Google chrome provides a lot of options and considerable tools as well as extensions and themes. It offers to apply plenty of pretty beautiful themes to change the interface of your browser.

Well, We are talking about How to bookmark web page in Google Chrome.

Bookmarking is a best option to shortcut a information also you can say a web page. Book marking allows the users to tab the important data, which they've received from Internet.

Google Chrome enables book-mark option in a simple way, that's why It could be a point that Google Chrome prefer top priority in Internet World of browsers.

Steps to Book Mark a Web Page in Google Chrome

  • Open the browser (Google Chrome)
  • Then, open your informative website, which you've to bookmark for your self.
  • On the Web-Address Location of the browser (URL bar), there is a transparent STAR on the right.
  • Click on the Star, and then the star will be active with representing the yellow color. 

Okay! This has all done, The star goes yellow and you've considerably book-mark your page. 

What to do when to reach the saved bookmark ?

Aha! Don't be worry to view your bookmark page. 
After opening your browser, you'll get the bookmarks below the Web Address bar.

UN-Bookmarking Web Page How ?

To un-bookmark your web page or to disable the specific bookmark on a particular page. You'll have to click on the BOOKMARK STAR, which is placed inside the browser after the Web Address Bar. 

Your Views and Comments

Your comments are worth-full, We would appreciate and love to see your comments and views about the topic, Point out our mistakes, if found!

Proudly Powered by Blogger.